Home » Articles posted by Dexter Simon
Author Archives: Dexter Simon
Tips For Painting Inside Of Cabinets
Painting Inside Of Cabinets give them a statement-making burst of color. Follow this strategy to ensure an even paint job that withstands daily wear and tear.
Start by removing the doors and labeling where the hinges go for easy reassembly. Next, remove adjustable shelves (if possible).
Sand all surfaces then apply a stain blocking oil-based primer. Let it dry before proceeding with your finish coats.
Before starting, make sure the cabinets are clean and free of dust. Using a sponge and soapy water, wipe down all surfaces of the cabinet interiors to remove any dirt, grease or food residue. If there are any cracks or stains that need to be filled in, do so now and let them dry completely. This step is critical for a long-lasting paint job.
If you haven’t already done so, sand all of the surfaces you plan to paint. Then vacuum or use a lint-free rag to wipe away any dust and debris left behind. Any small particles that aren’t cleaned up can waft into the painted surface and cause a bump or flaw in your finished product.
Depending on the paint you’re using, it may require a special primer or need to be primed before applying the new color. Read the label to determine the best way to prepare the cabinets for painting. A high-quality, latex primer is often sufficient if the cabinet interiors are in good condition, but oil-based alkyd primers and shellacs are also common options. Before applying your primer, remember that it will outgas fumes for a while afterward, so choose an area of the house that can stay closed to reduce exposure.
Once the primer is dry, you’re ready to start painting! Work on a table to reduce drips and runny spots, and apply two coats to ensure a uniform finish. Be sure to allow each coat to dry fully between applications and to follow the product’s maximum recoat time before placing anything back into your cabinets.
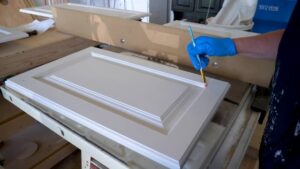
Unlike exterior cabinet doors, it’s best to paint the inside of cabinet drawers and shelves with a brush rather than a roller to get better coverage on curved surfaces and corners. Start with the bottoms of the cabinet boxes and then move on to the sides of the cabinets, working on one side at a time so you can turn them over before moving on to the other side. Keep a drop cloth under each section to catch any drips and protect countertops and floors from overspray.
Primer
If you’re going to go through the trouble of painting your cabinet doors and drawers, it’s best to give them a good once-over with a quality primer. Primer is like the glue layer that connects your paint to your cabinets and helps it stick really well. It’s also what helps to prevent bleed-through (when stains or paint colors from underlying surfaces seep through and impact the new coat).
Choose a good primer for your cabinets, based on the material they’re made from. Particleboard and medium-density fiberboard tend to soak up water, so a waterproof or mildew-resistant primer is a smart choice in moisture-prone areas.
It’s important to sand before priming and painting because this gives the primer something to adhere to, but be careful not to go too overboard; you want a smooth surface to work with, not an ugly mess. When in doubt, use a sanding block and a light touch to remove any dust or dirt particles that might mar your newly-primed surface. Once the sanding is done, vacuum the cabinet doors and drawers to ensure that no bits of sanding dust get in the way of your work.
There are several different types of primers, ranging from water-based to oil-based to shellac-based. Each one has its own set of properties and pros and cons, but in general, a water-based primer is a DIY favorite because it dries quickly, emits minimal odor, and cleans up easily. Oil-based odor- and stain-blocking primers perform well and are able to hide previous finishes, but they may require longer dry times than other options.
Whether you opt for a water-based or oil-based primer, make sure that it’s compatible with your chosen cabinet finish. It’s best to wait 16-24 hours before you apply your first coat of paint, allowing the primer and then the paint to cure completely. After your first coat is on and dried, sand lightly again with a medium-grit sanding block to achieve a smooth surface that’ll look great and hold onto your desired color for a long time.
Paint
When it comes to painting interior cabinets, the best choice is oil-based paint. It’s easy to find, DIY-friendly and has a smooth, durable finish that can withstand the wear and tear of frequent opening and closing of cabinet doors. However, it does have a strong odor, takes longer to dry and can yellow over time. If you’re planning to use latex, choose a synthetic brush, since the water-based formula may swell the bristles of natural brushes. It’s also important to remove all hardware and fill any screw holes for a smoother, even finish.
If you’re using a dark shade, select a primer designed for that color to prevent the paint from showing through and create a patchy finish. If you’re redoing your cabinets with a light shade, a white or cream primer will keep discoloration, splotches and visible knots at bay.
For a smooth, durable finish, apply two coats of the chosen cabinet paint to the entire surface. If you’re using a roller, make sure to back-brush the rolled paint to help smooth out any splotches and ensure a consistent, clean look. Using a brush, start at the top of your cabinets and work your way down to avoid any cross-over of brush strokes. Be sure to paint the back of the cabinets as well and to allow for the proper curing time before reassembling your cabinets.
Once the first coat of paint has dried, sand the cabinets lightly with 220-grit sandpaper to smooth any rough areas and give your second coat an even surface. Then, if necessary, apply an additional coat of paint. If you’re painting over an old oil-based finish, make sure to sand in between coats to ensure a smooth, even finish.
If a brush or roller seem like too much work, consider renting a paint sprayer, which is easy to use, reasonably affordable and guarantees a smooth, professional finish. Just be aware that the air movement from the sprayer will generate fumes, so it’s essential to have your work space adequately ventilated. Keep the windows open and turn on fans to speed up the drying process, and be careful not to touch or slam cabinet doors until the paint has cured to a hard, durable surface.
Finish
In the past, oil paint was the go-to choice for cabinet interiors because it offers good adhesion, durability, and a smooth finish. However, it requires solvents for cleaning up and has a strong, unpleasant odor. It can also yellow over time. Latex, on the other hand, is easier to clean and has less of a odor. However, it doesn’t dry as quickly as oil-based paint and can be more susceptible to stains.
If you’re deciding between oil-based and latex paint for your cabinets, it is important to choose the right primer. Look for one that is designed specifically for the color you are painting and formulated to prevent staining. If you’re painting light colors, use a primer that is formulated for white or cream; if you’re going with dark colors, get a stain-blocking primer for best results.
Once the primer has dried, you can begin painting the cabinets with your chosen paint. For the best results, you should choose a semi-gloss or satin finish that is easy to wipe down. Avoid matte finishes, which are hard to clean and can show smudges and fingerprints easily.
You can also consider using an acrylic paint with a urethane topcoat to create an enamel-like product that will resist high temperatures and protect the cabinets from wear and tear. This option is especially great if you have cabinets over your stove, which will experience high temperatures regularly.
Another option is to find an alkyd paint that dries to a hard finish that’s easy to wipe down and clean. Look for a formula that’s low in VOCs (volatile organic compounds) and doesn’t require the use of turpentine or mineral spirits to clean up, as many old-fashioned alkyd paints used to do.
Once the paint has dried, you can reattach the cabinet doors and hardware. Be sure to wait a few days for the cabinets to fully cure to a durable, weather-resistant finish. And remember, until the cabinets are cured, be careful not to slam or scrape them with anything.
How Siding Can Increase Your Home’s Curb Appeal
Montana Siding is the material that covers and protects the exterior of a home. It is available in various materials and styles that give your house a unique look.

Some of the most popular options are vinyl, brick and stone. Each has its pros and cons.
The first impression a potential buyer has of your home is its curb appeal. They’ll likely pass up a house with damaged siding or a faded exterior, even if the interior looks great. In fact, according to real estate agents surveyed by HomeLight, buyers will pay 7% more for a house with attractive curbside appeal.
Siding provides several important functions, including protection from harsh weather and pests. It also improves insulation and helps to protect inside structures from water damage. Replacing your old siding with new, bright colors will significantly increase your home’s curb appeal, which in turn will help boost resale value.
When it comes to choosing the right color, consider a timeless shade such as beige or gray. These neutrals are versatile and can compliment a variety of architectural styles. Bright or trendy colors may appeal to a niche group of buyers, but they can quickly go out of style and reduce resale value.
Aside from the aesthetic value, consider the longevity and durability of your new siding. Fiber cement siding, such as James Hardie products, is a highly popular option and will increase your home’s resale value significantly. It is more durable than vinyl and is not prone to warping or fading. It is also moisture-resistant, rot-proof and unappealing to insects and woodpeckers.
Regardless of the type of siding you choose, it is essential to hire a reputable contractor to ensure the job is done properly. Check online reviews and ask for recommendations from friends and family before hiring anyone. Make sure the company you choose is licensed and insured, and that they have experience working on homes in your area. Also, be sure to ask about financing options. In many cases, this will be the most affordable and fastest way to get your project started. If you’re unsure of what options are available, consult a local mortgage broker or real estate agent for advice. They can provide insights into the best siding material and colors that will appeal to buyers in your area. They can also help you determine the ideal budget for your project.
Low Maintenance
Many home siding options are billed as low-maintenance, but not all of them live up to their claim. Some, such as vinyl, may melt in hot temperatures and crack under pressure, while others like wood, are susceptible to mold, mildew, and rot that require extensive repair work.
The best siding options for low maintenance are made from tougher materials and require far less care than other options. These include fiber cement siding, brick and stone, and metal. These also have the longest lifespans of any siding type, making them an excellent choice for homeowners who want to minimize the amount of money they invest in home improvement projects over time.
Wood, vinyl, brick, and stucco are all options that are frequently advertised as low-maintenance, but each has its own set of unique benefits and drawbacks. Wood siding, for example, has a timeless look that appeals to some homeowners, but it is also highly vulnerable to mold and mildew and requires frequent re-painting. Vinyl is durable, but it can crack under pressure or if it is exposed to extremely cold weather conditions.
Brick is a classic choice that is resistant to fire, mold, and rot, but it can become brittle over time and has a limited color selection. Stucco, on the other hand, is impervious to insects and fungus, but it is also expensive to install and can easily crack or stain.
Among the true low-maintenance options, fiber cement siding is an excellent choice that can be used to imitate rustic wood grain or in modern and contemporary designs. This human-made material is a mix of Portland cement, cellulose fiber, sand, and silica. It is heavy, dense, and water-resistant. It can be treated with insoluble preservatives to resist rot, and it is also fire-resistant.
TruExterior and LP SmartSide are other composite sidings that are similar to fiber cement, but they use fly ash and polymers instead of portland cement and sand for added strength and dimensional stability. These materials also have a high level of fade resistance, meaning they will not lose their color as fast as traditional siding products.
Better Insulation
The insulating properties of siding are often overlooked. Most people think about insulation inside their homes when it comes to energy savings, but the outside of your home also has a significant impact on how your house feels and how much you pay for electricity.
Siding helps to keep your home at comfortable temperatures year round, and this is especially important during the summer. High humidity levels cause your air conditioner to work harder to cool your house, resulting in higher energy bills. Insulated vinyl can help to reduce this effect by keeping your home cooler and making it easier to lower your air conditioning settings.
There are many ways to improve your home’s energy efficiency, but new siding is a great place to start. Vinyl, wood and fiber cement siding can all help to improve your home’s insulating levels, but if you want the best results, consider investing in insulated vinyl. This type of siding is made through a similar process to traditional vinyl, but it is reinforced with rigid foam that increases its insulating capabilities.
Whether you are looking for a long-lasting material that is easy to maintain or you want something that will enhance your home’s curb appeal, insulated vinyl is an excellent option. It is available in a variety of colors and textures, so you can find the perfect look for your home. In addition to its aesthetic qualities, insulated vinyl can reduce your utility bills and provide added peace of mind.
There are several types of siding available, including wood, fiberglass, vinyl and concrete, but most of these materials have low insulating values and require a lot of maintenance. Fiber cement siding, like that offered by James Hardie, is long-lasting, termite-proof and fire and rot resistant. It also has a good R-value and is compatible with foam insulation products that can increase its insulating abilities even further.
Increased Curb Appeal
Investing in new siding is an excellent way to increase your home’s curb appeal. Whether you choose to match the color of your existing trim or go with high contrast shades, your house will stand out in the neighborhood and leave a positive impression on people who drive by. This can be a great selling point for potential buyers who are looking to buy your home.
New siding protects the interior of a home from harsh weather conditions and helps to lock in both heat and cold, which is a major benefit to homebuyers who are trying to conserve energy costs. Additionally, many homeowners are able to add their own style preferences through the use of a variety of colors, designs and textures that are available.
There are a wide range of siding styles to choose from including lap, shingle and shake to name a few. Homeowners can even incorporate accent pieces like window trim, doorknobs and outdoor sconces to enhance the look of their home’s exterior.
If you are unsure which siding style would best suit your home, visiting a showroom like American Cedar & Millwork in Deleware or Maryland can provide the opportunity to view different types of materials and see how they look on actual homes. This can help you to decide which style may work well for your home and give you confidence in your decision-making process.
The type of siding you choose can also be a major factor in your home’s resale value. Engineered wood siding like LP SmartSide offers the look of natural wood but comes with additional benefits that can be appealing to buyers. This includes the reassurance that it is protected against moisture damage, termites and fungal decay.
Updating your home’s exterior is an important step in ensuring its long-term durability and resale value. A home that looks outdated can be difficult to sell, especially if it’s in need of other costly and time-consuming renovations such as a new kitchen or boiler. Replacing your siding is a cost-effective solution that can provide immediate and ongoing benefits for years to come.